Peanut Butter Cup Brownies are the ultimate treat for anyone who loves the combination of chocolate and peanut butter. These brownies are ultra-fudgy, rich, and loaded with peanut butter cups in every bite. Imagine a warm slice straight from the oven, the chocolate melting slightly while the sweet aroma fills your kitchen. They are perfect for a weeknight dessert, bake sales, or as a special weekend indulgence. Trust me, once you take a bite, you won’t want to stop at just one!
- Why This Recipe Is Worth Your Time
- Main Ingredients
- Tools Needed
- Step-by-Step Instructions
- Pro Tips
- Serving Ideas and Pairings
- Variations and Swaps
- Leftovers and Storage Tips
- Nutrition Notes
- Frequently Asked Questions
Why This Peanut Butter Cup Brownies Recipe Is Worth Your Time
These Peanut Butter Cup Brownies offer an incredible flavor balance that satisfies both chocolate and peanut butter cravings. The combination of the rich, fudgy brownie base with the creamy texture of the peanut butter cups creates a mouthwatering experience that you’ll want to share with everyone. Not only do they taste amazing, but they are also quite practical to make. With simple ingredients and straightforward steps, you can whip these up even on a busy weeknight. Plus, they are a guaranteed hit at gatherings, making them a standout dessert that everyone will remember.
Main Ingredients for Peanut Butter Cup Brownies
Let’s take a closer look at what you’ll need for these delightful brownies:
- ½ cup salted butter: Provides richness and moisture to the brownies. Unsalted butter can be used as a substitute, just add a pinch of salt.
- 1 ½ cups granulated sugar: Sweetens the brownies and contributes to their fudgy texture.
- 2 teaspoons vanilla extract: Enhances the flavor profile, adding a warm, aromatic sweetness.
- 3 large eggs: Binds the ingredients together and helps the brownies rise slightly.
- ¾ cup all-purpose flour: Gives structure to the brownies; whole wheat flour can be a substitution for a heartier texture.
- ½ cup unsweetened cocoa powder: Provides the rich chocolate flavor that makes these brownies a decadent treat.
- ½ teaspoon salt: Balances the sweetness and enhances the chocolate flavor.
- ½ teaspoon baking powder: Adds a little lift to the brownies for a softer texture.
- 24 full-size chocolate peanut butter cups: The star ingredient, adding creamy peanut butter flavor and delightful chunks throughout the brownies.
Tools Needed for Peanut Butter Cup Brownies
| Tool | Purpose / what it helps with |
| Mixing bowls | Used for combining the wet and dry ingredients. |
| Hand mixer or standing mixer | Helps to thoroughly mix the batter for a smooth consistency. |
| 9×13 inch rectangular baking pan | Holds the brownie batter while baking. |
| Parchment paper | Lines the baking pan for easy removal of brownies. |
| Nonstick cooking spray | Prevents the brownies from sticking to the pan. |
| Rubber spatula | Useful for spreading batter evenly and scraping down the sides of bowls. |
| Toothpick | Checks for doneness by testing the brownies in the center. |
Step-by-Step Instructions for Peanut Butter Cup Brownies
Now that we have everything ready, let’s dive into making these mouthwatering Peanut Butter Cup Brownies. Follow these steps closely for the best results:
- Preheat your oven to 350°F. This is crucial as it ensures that your brownies cook evenly.
- Prepare a 9×13 inch rectangular baking pan by lining it with parchment paper and spraying it with nonstick cooking spray. This will help you lift the brownies out easily once they are cooled.
- In a mixing bowl, beat together the melted butter and granulated sugar using a hand mixer or standing mixer. You want to mix until well combined and creamy.
- Incorporate the vanilla extract and eggs into the mixture, adding each egg one at a time and mixing well after each addition. This helps to incorporate air into the batter, giving it a light texture.
- In a separate bowl, sift together the flour, cocoa powder, salt, and baking powder, then add this dry mixture to the butter and sugar mixture. Sifting helps to remove any lumps and ensures an even distribution of dry ingredients.
- Continue to beat the mixture until everything is fully combined. The batter should be thick and smooth.
- Carefully spread half of the brownie batter across the bottom of the prepared baking pan, ensuring it covers the entire surface. This forms the base layer for your delicious peanut butter cups.
- Place the chocolate peanut butter cups into the brownie batter, arranging them in neat rows. The more evenly spaced, the better the distribution of peanut butter goodness!
- Spread the remaining brownie batter over the peanut butter cups and smooth it out evenly. Make sure to cover the cups completely so they don’t burn while baking.
- Bake in the preheated oven for 30 minutes. The brownies are done when the batter is set in the middle and a toothpick inserted in the center comes out with a few moist crumbs.
- Once baked, remove the brownies from the oven and let them cool completely in the pan. This will help them set up a bit more.
- After cooling, you can lift the brownies from the pan by pulling on the edges of the parchment paper. Cut them into pieces and enjoy!
Pro Tips for Perfect Peanut Butter Cup Brownies
- Allow the brownies to cool completely before cutting for cleaner slices.
- For extra fudginess, slightly underbake the brownies; they will continue to set as they cool.
- Use high-quality peanut butter cups for the best flavor.
- Experiment with different toppings such as whipped cream or a drizzle of melted chocolate.
- If you want a deeper chocolate flavor, consider adding a tablespoon of espresso powder to the dry ingredients.
- Store leftovers in an airtight container at room temperature for up to 3 days to keep them fresh.
Serving Ideas and Pairings
- Serve warm with a scoop of vanilla ice cream for an indulgent dessert.
- Pair with a glass of cold milk to enhance the chocolate and peanut butter flavors.
- Top with whipped cream and a sprinkle of crushed peanut butter cups for extra flair.
- Serve alongside fresh strawberries or raspberries for a refreshing contrast.
- Enjoy with a cup of coffee or hot chocolate for a cozy treat.
Variations and Swaps for Peanut Butter Cup Brownies
Faster Weeknight Version
To save time, use a boxed brownie mix and fold in chopped peanut butter cups before baking. This will cut down on prep time while still giving you a delicious treat.
Lighter Version
Replace half the butter with unsweetened applesauce and use a sugar substitute to lower the calorie content while maintaining moisture.
High-Protein Version
Add a scoop of protein powder to the dry ingredients for an added boost, making these brownies a more filling snack.
Budget-Friendly Version
Use generic brands of ingredients or buy in bulk to reduce costs without sacrificing flavor.
Leftovers and Storage Tips
- Store leftover brownies in an airtight container at room temperature for up to 3 days.
- For longer storage, refrigerate for up to a week.
- These brownies freeze well; wrap them tightly in plastic wrap and place in a freezer-safe bag for up to 3 months.
- To reheat, pop a brownie in the microwave for about 15 seconds for a warm treat.
- Thaw frozen brownies in the refrigerator overnight before enjoying.
Nutrition Notes
Each serving of these Peanut Butter Cup Brownies is approximately 250 calories, with a balance of carbohydrates, fats, and proteins. For those looking to adjust for allergies or dietary preferences, consider using gluten-free flour or sugar alternatives. Always check the labels on your peanut butter cups for any specific allergens.
Frequently Asked Questions About Peanut Butter Cup Brownies
Can I make Peanut Butter Cup Brownies ahead of time?
Absolutely! You can make these brownies a day in advance. Just store them in an airtight container to keep them fresh.
How do I know when the Peanut Butter Cup Brownies are done baking?
The brownies are done when the batter is set in the middle, and a toothpick inserted in the center comes out with a few moist crumbs.
Can I substitute the peanut butter cups in the recipe?
Yes, you can use any chocolate candy you like, such as chocolate chips or caramel-filled candies, for a different flavor.
What’s the best way to cut the brownies?
For clean cuts, use a sharp knife and wipe it clean between cuts to prevent sticking.
Can I add nuts to the Peanut Butter Cup Brownies?
Definitely! Chopped nuts like pecans or walnuts can be added to the batter for extra texture and flavor.
Now that you have the complete guide to making these decadent Peanut Butter Cup Brownies, I hope you feel inspired to give them a try. With their rich chocolate flavor and creamy peanut butter goodness, they are sure to become a favorite in your home. Enjoy the process and don’t forget to share with friends and family!
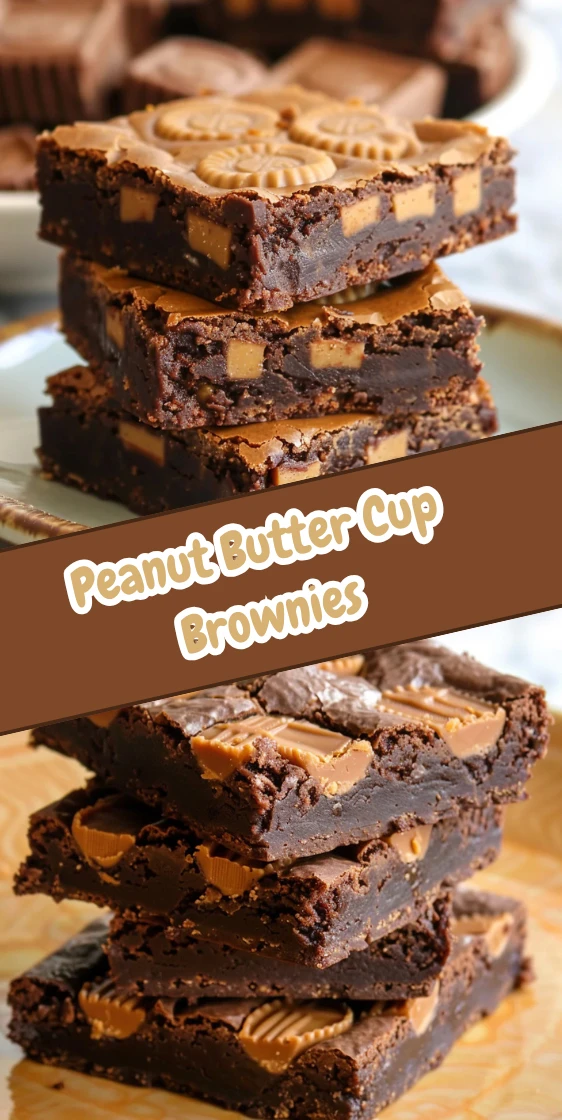

Peanut Butter Cup Brownies Delight
Ingredients
Method
- Preheat your oven to 350°F.
- Prepare a 9×13 inch rectangular baking pan by lining it with parchment paper and spraying it with nonstick cooking spray.
- In a mixing bowl, beat together the melted butter and granulated sugar using a hand mixer or standing mixer.
- Incorporate the vanilla extract and eggs into the mixture, adding each egg one at a time and mixing well after each addition.
- In a separate bowl, sift together the flour, cocoa powder, salt, and baking powder, then add this dry mixture to the butter and sugar mixture.
- Continue to beat the mixture until everything is fully combined.
- Carefully spread half of the brownie batter across the bottom of the prepared baking pan, ensuring it covers the entire surface.
- Place the chocolate peanut butter cups into the brownie batter, arranging them in neat rows.
- Spread the remaining brownie batter over the peanut butter cups and smooth it out evenly.
- Bake in the preheated oven for 30 minutes. The brownies are done when the batter is set in the middle and a toothpick inserted in the center comes out with a few moist crumbs.
- Once baked, remove the brownies from the oven and let them cool completely in the pan.
- After cooling, you can lift the brownies from the pan by pulling on the edges of the parchment paper. Cut them into pieces and enjoy!


